> ## Documentation Index
> Fetch the complete documentation index at: https://docs.nova-cloud.ai/llms.txt
> Use this file to discover all available pages before exploring further.
# Quickstart
> Get your first GPU instance running in under 5 minutes.
This guide walks you through creating an account, adding funds, and launching your first GPU-powered virtual machine — all from the web console.
## Prerequisites
* An email address or Google account
* A credit card for adding credits
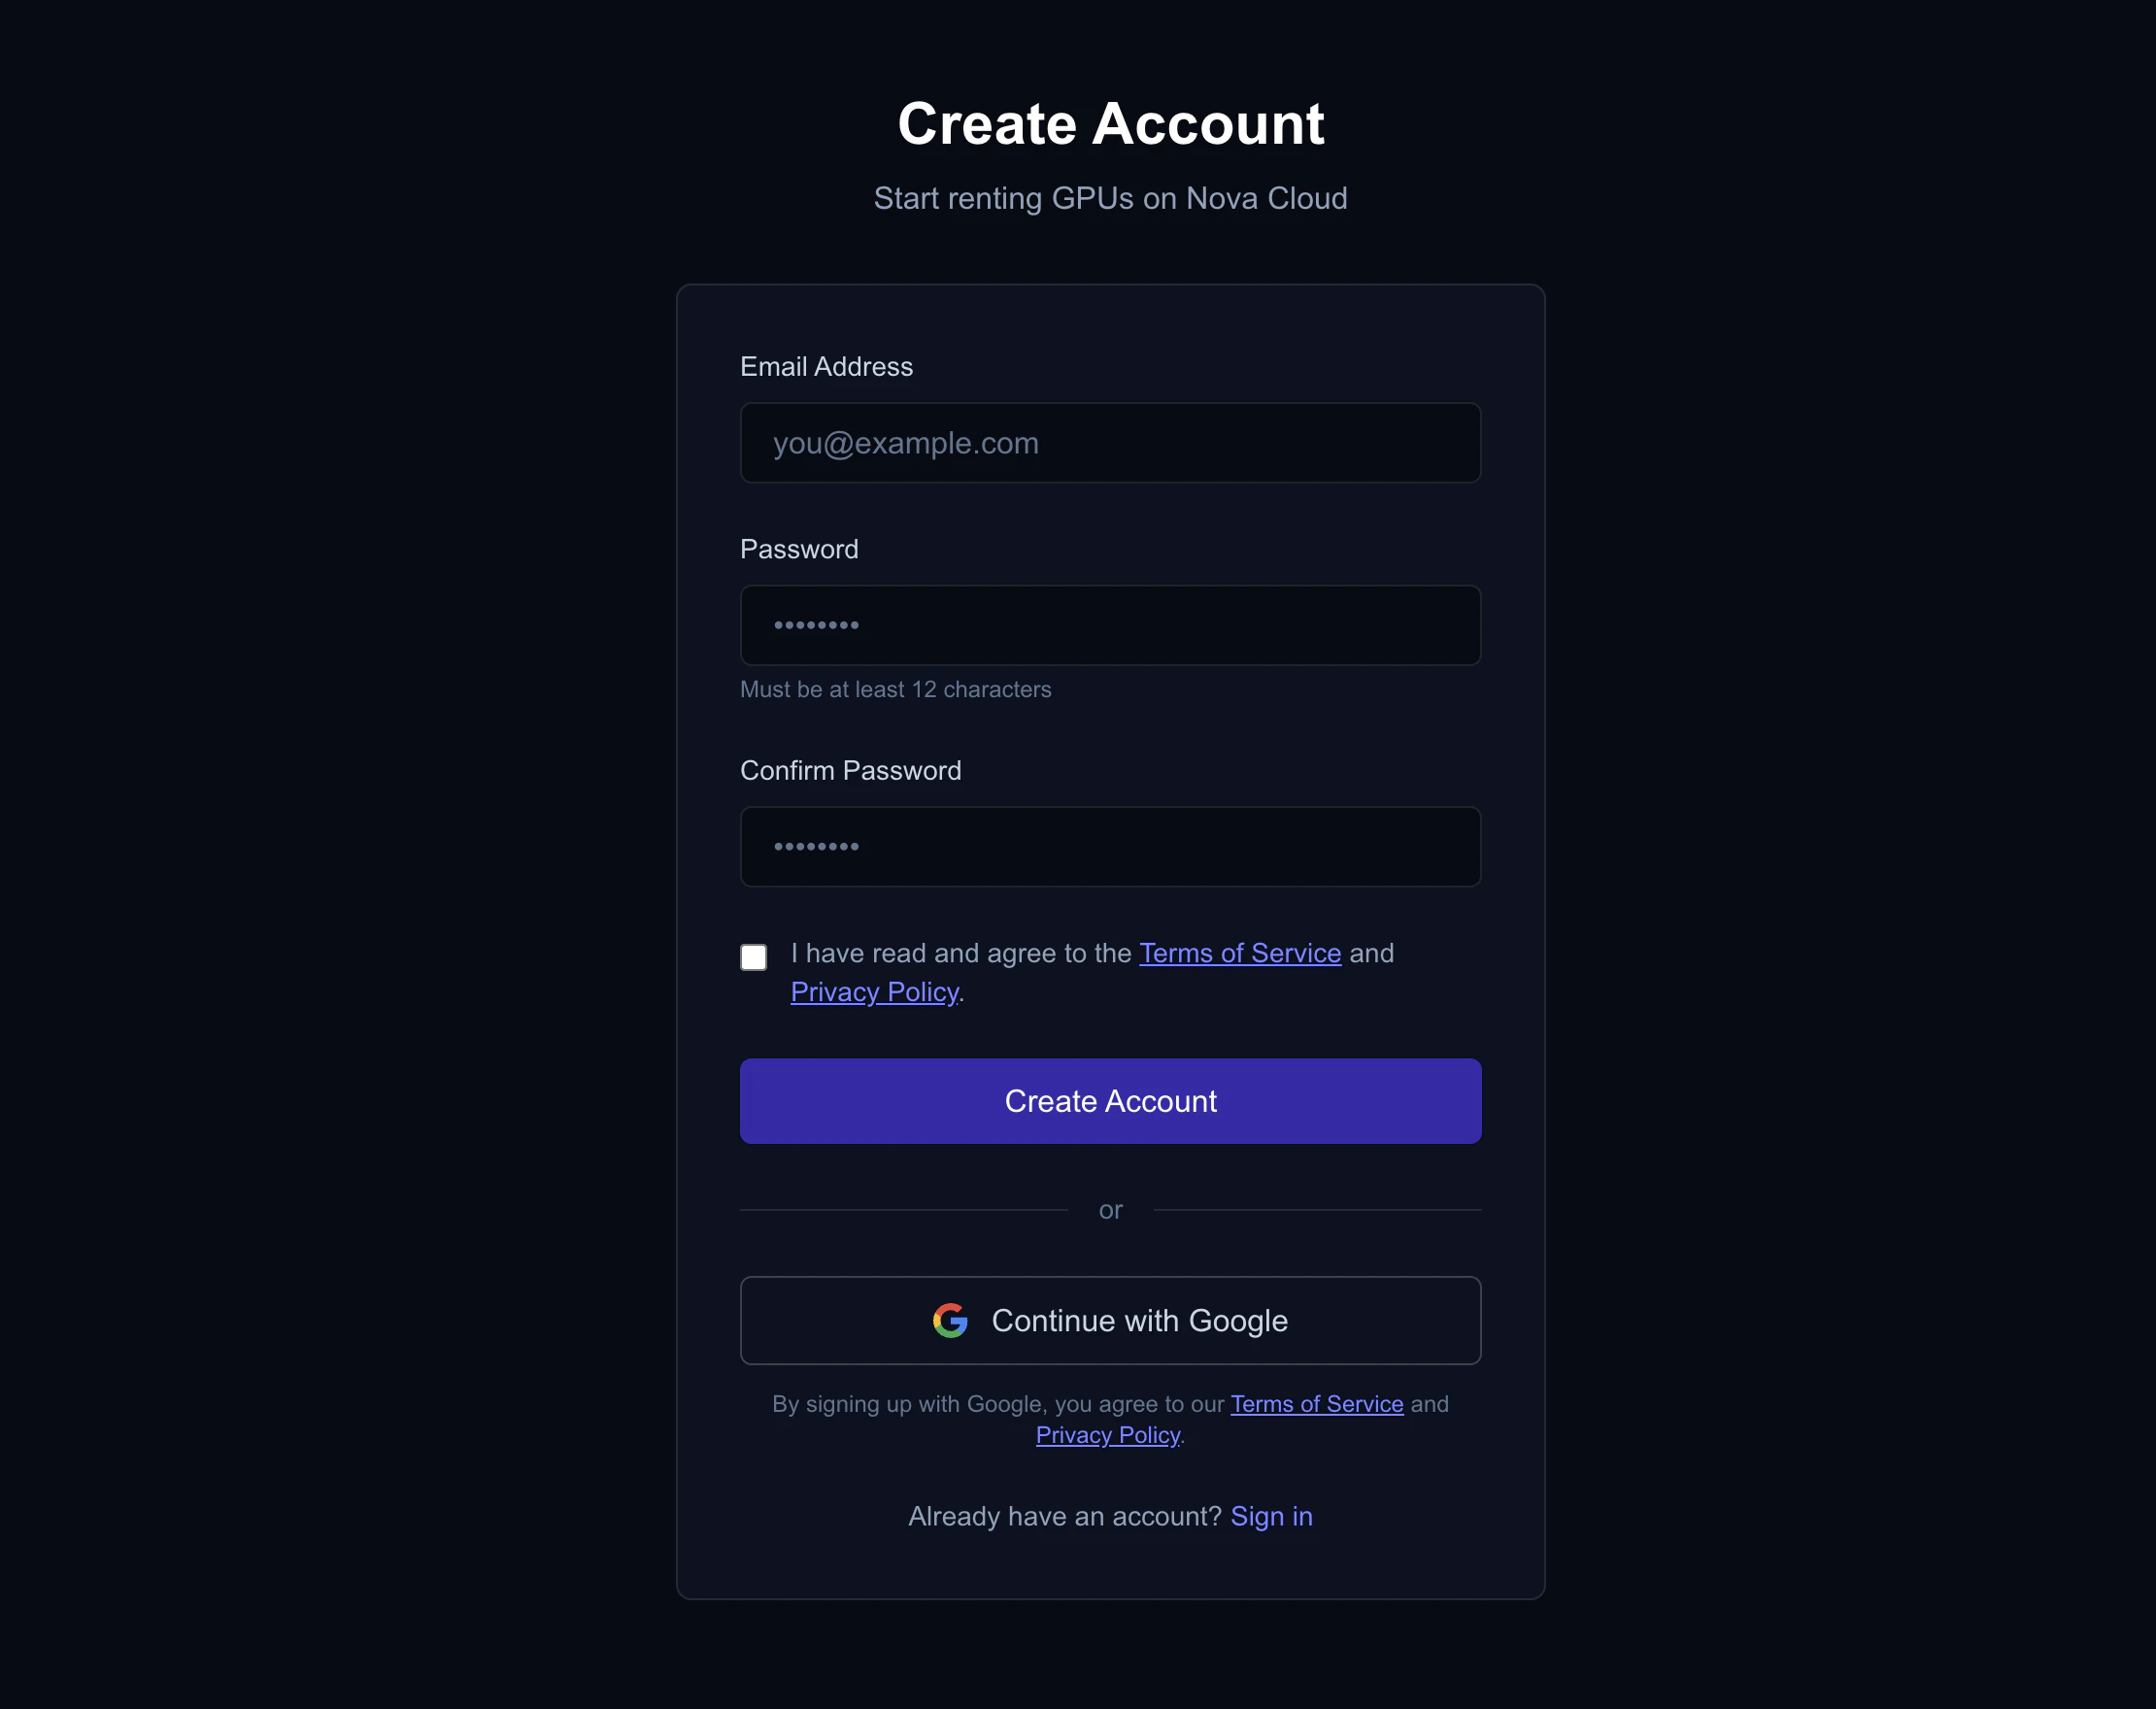
## Step 1: Create Your Account
1. Go to [console.nova-cloud.ai/signup](https://console.nova-cloud.ai/signup)
2. Sign up with email/password or Google OAuth
3. Verify your email (automatic on Google Sign in) — required to be eligible for the signup bonus
 ## Step 2: Add Credits & Unlock Your Signup Bonus
1. In the console, go to the **Billing** section
2. Click **Add Credits**
3. Add at least **\$5** via credit card
4. Your **signup bonus** (a dollar-for-dollar match of your deposit, up to **\$25**) is automatically applied once the deposit clears
## Step 2: Add Credits & Unlock Your Signup Bonus
1. In the console, go to the **Billing** section
2. Click **Add Credits**
3. Add at least **\$5** via credit card
4. Your **signup bonus** (a dollar-for-dollar match of your deposit, up to **\$25**) is automatically applied once the deposit clears
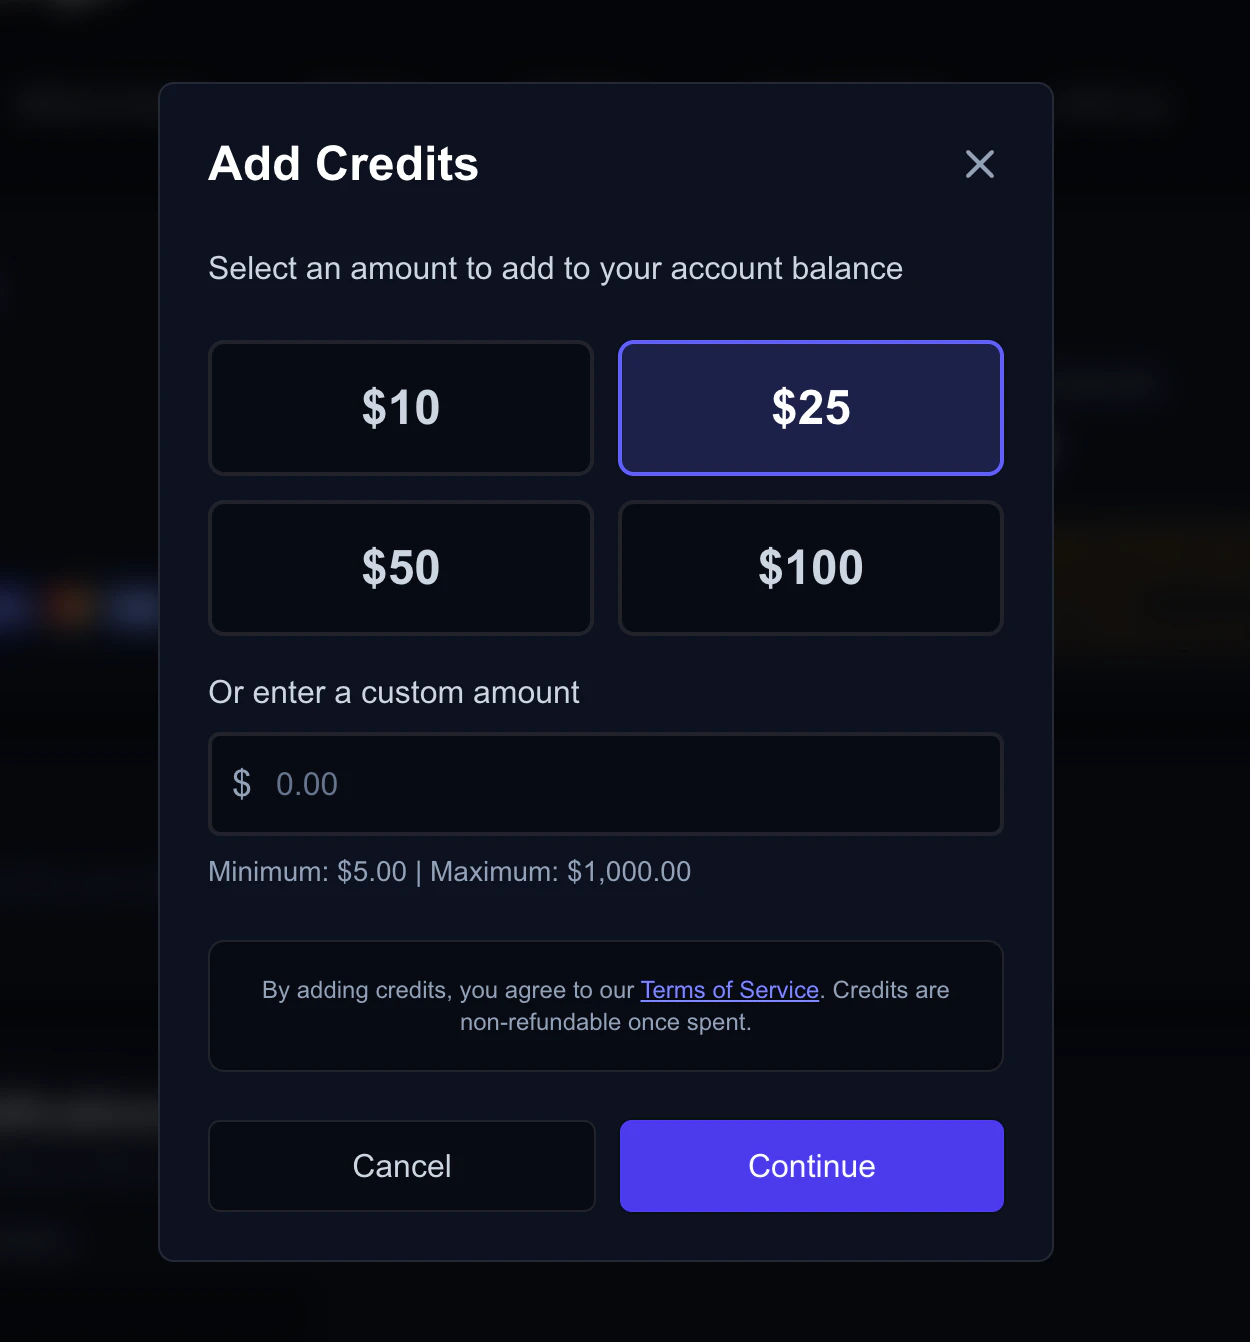 We match your first deposit dollar-for-dollar, up to **\$25 in bonus credit**. Minimum deposit is \$5 — deposit \$5 and you get \$5 bonus, deposit \$25 or more and you get the full \$25.
## Step 3: Generate & Upload Your SSH Key
SSH keys let you securely connect to your VMs without a password. If you already have an SSH key, skip to **Upload Your Key** below.
We **highly reccomend** using SSH keys for authentication, however we do support password authentication. If you would rather use a **strong** password, you can skip to step 4
1. Open the **Terminal** app (search for "Terminal" in Spotlight, or find it in Applications → Utilities)
2. Paste this command and press Enter:
```bash theme={null}
ssh-keygen -t ed25519 -C "your-email@example.com"
```
3. When asked where to save the file, just press **Enter** to use the default location
4. When asked for a passphrase, press **Enter** twice (or type a passphrase for extra security)
5. Copy your public key to the clipboard:
```bash theme={null}
pbcopy < ~/.ssh/id_ed25519.pub
```
You'll see no output — the key is now on your clipboard, ready to paste.
1. Open **PowerShell** (search for "PowerShell" in the Start menu)
2. Paste this command and press Enter:
```powershell theme={null}
ssh-keygen -t ed25519 -C "your-email@example.com"
```
3. When asked where to save the file, just press **Enter** to use the default location
4. When asked for a passphrase, press **Enter** twice (or type a passphrase for extra security)
5. Copy your public key to the clipboard:
```powershell theme={null}
Get-Content $env:USERPROFILE\.ssh\id_ed25519.pub | Set-Clipboard
```
You'll see no output — the key is now on your clipboard, ready to paste.
1. Open a terminal
2. Run:
```bash theme={null}
ssh-keygen -t ed25519 -C "your-email@example.com"
```
3. Press **Enter** to accept the default file location, then **Enter** twice for no passphrase (or set one)
4. Copy your public key:
```bash theme={null}
cat ~/.ssh/id_ed25519.pub
```
Select and copy the entire output line.
### Upload Your Key
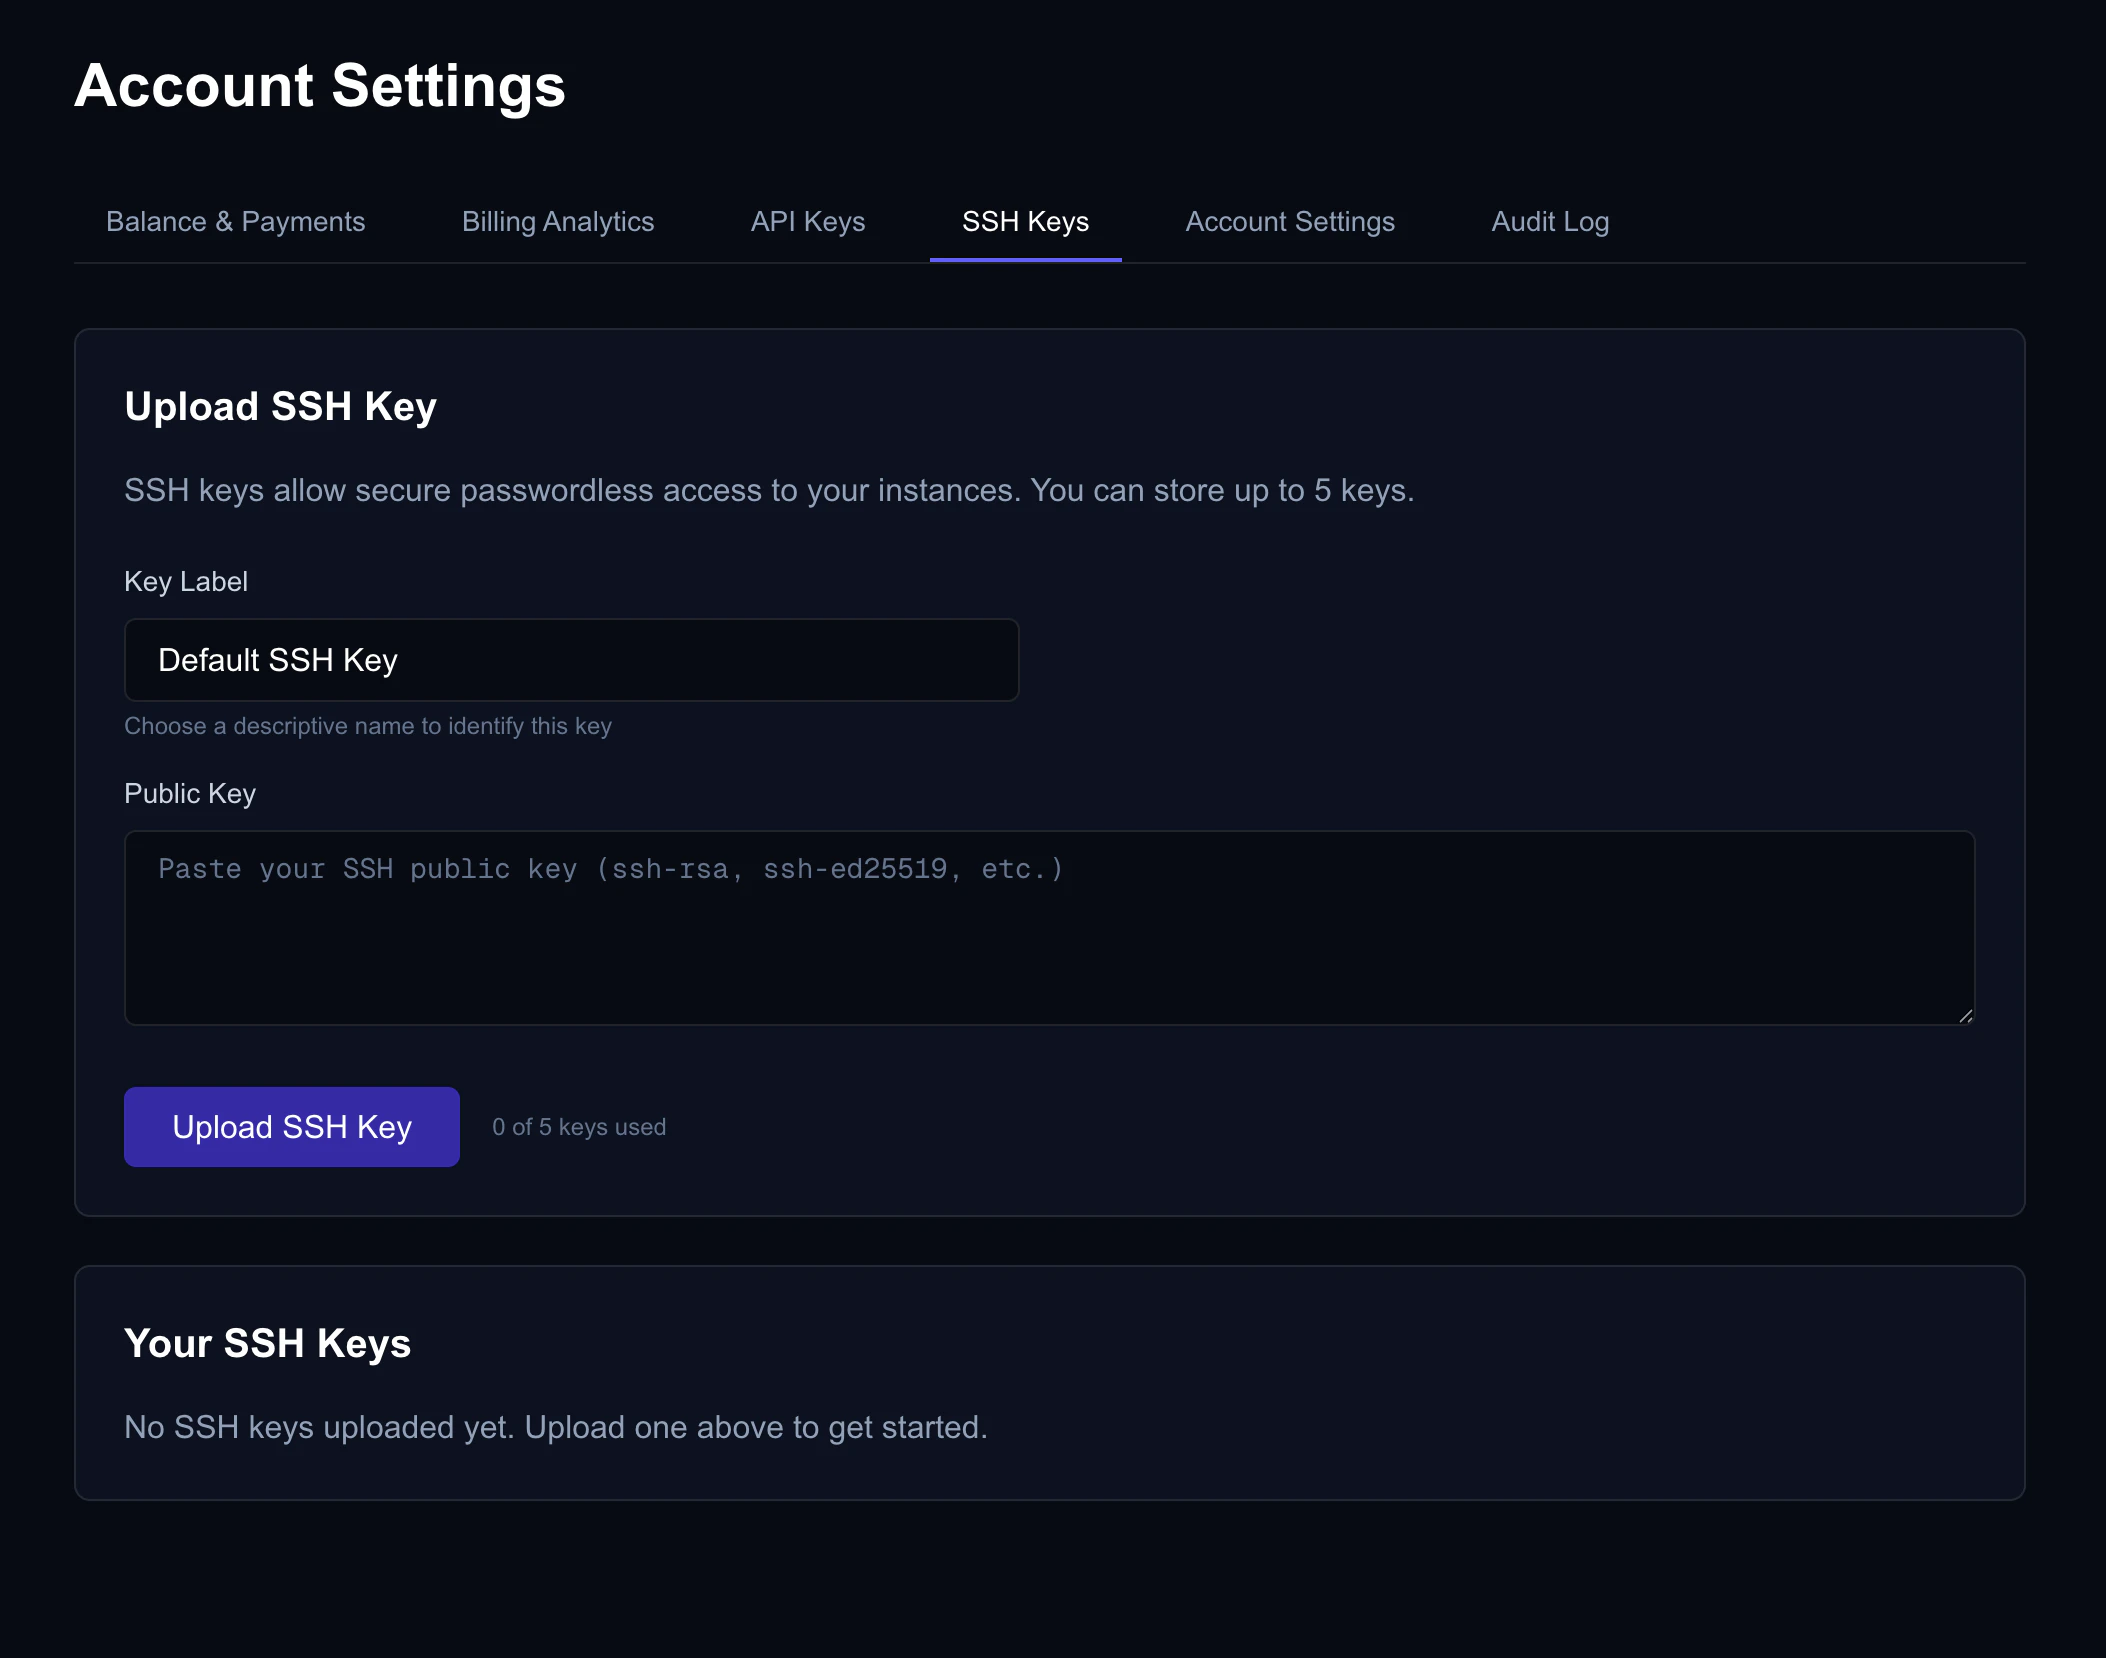
1. In the console, go to **Account Settings** → **SSH Keys**
2. Click **Add SSH Key**
3. Paste your public key (the text you just copied)
4. Give it a name like "My Laptop"
5. Click **Save**
We match your first deposit dollar-for-dollar, up to **\$25 in bonus credit**. Minimum deposit is \$5 — deposit \$5 and you get \$5 bonus, deposit \$25 or more and you get the full \$25.
## Step 3: Generate & Upload Your SSH Key
SSH keys let you securely connect to your VMs without a password. If you already have an SSH key, skip to **Upload Your Key** below.
We **highly reccomend** using SSH keys for authentication, however we do support password authentication. If you would rather use a **strong** password, you can skip to step 4
1. Open the **Terminal** app (search for "Terminal" in Spotlight, or find it in Applications → Utilities)
2. Paste this command and press Enter:
```bash theme={null}
ssh-keygen -t ed25519 -C "your-email@example.com"
```
3. When asked where to save the file, just press **Enter** to use the default location
4. When asked for a passphrase, press **Enter** twice (or type a passphrase for extra security)
5. Copy your public key to the clipboard:
```bash theme={null}
pbcopy < ~/.ssh/id_ed25519.pub
```
You'll see no output — the key is now on your clipboard, ready to paste.
1. Open **PowerShell** (search for "PowerShell" in the Start menu)
2. Paste this command and press Enter:
```powershell theme={null}
ssh-keygen -t ed25519 -C "your-email@example.com"
```
3. When asked where to save the file, just press **Enter** to use the default location
4. When asked for a passphrase, press **Enter** twice (or type a passphrase for extra security)
5. Copy your public key to the clipboard:
```powershell theme={null}
Get-Content $env:USERPROFILE\.ssh\id_ed25519.pub | Set-Clipboard
```
You'll see no output — the key is now on your clipboard, ready to paste.
1. Open a terminal
2. Run:
```bash theme={null}
ssh-keygen -t ed25519 -C "your-email@example.com"
```
3. Press **Enter** to accept the default file location, then **Enter** twice for no passphrase (or set one)
4. Copy your public key:
```bash theme={null}
cat ~/.ssh/id_ed25519.pub
```
Select and copy the entire output line.
### Upload Your Key
1. In the console, go to **Account Settings** → **SSH Keys**
2. Click **Add SSH Key**
3. Paste your public key (the text you just copied)
4. Give it a name like "My Laptop"
5. Click **Save**
 Detailed guide with troubleshooting tips for all platforms.
## Step 4: Launch a VM
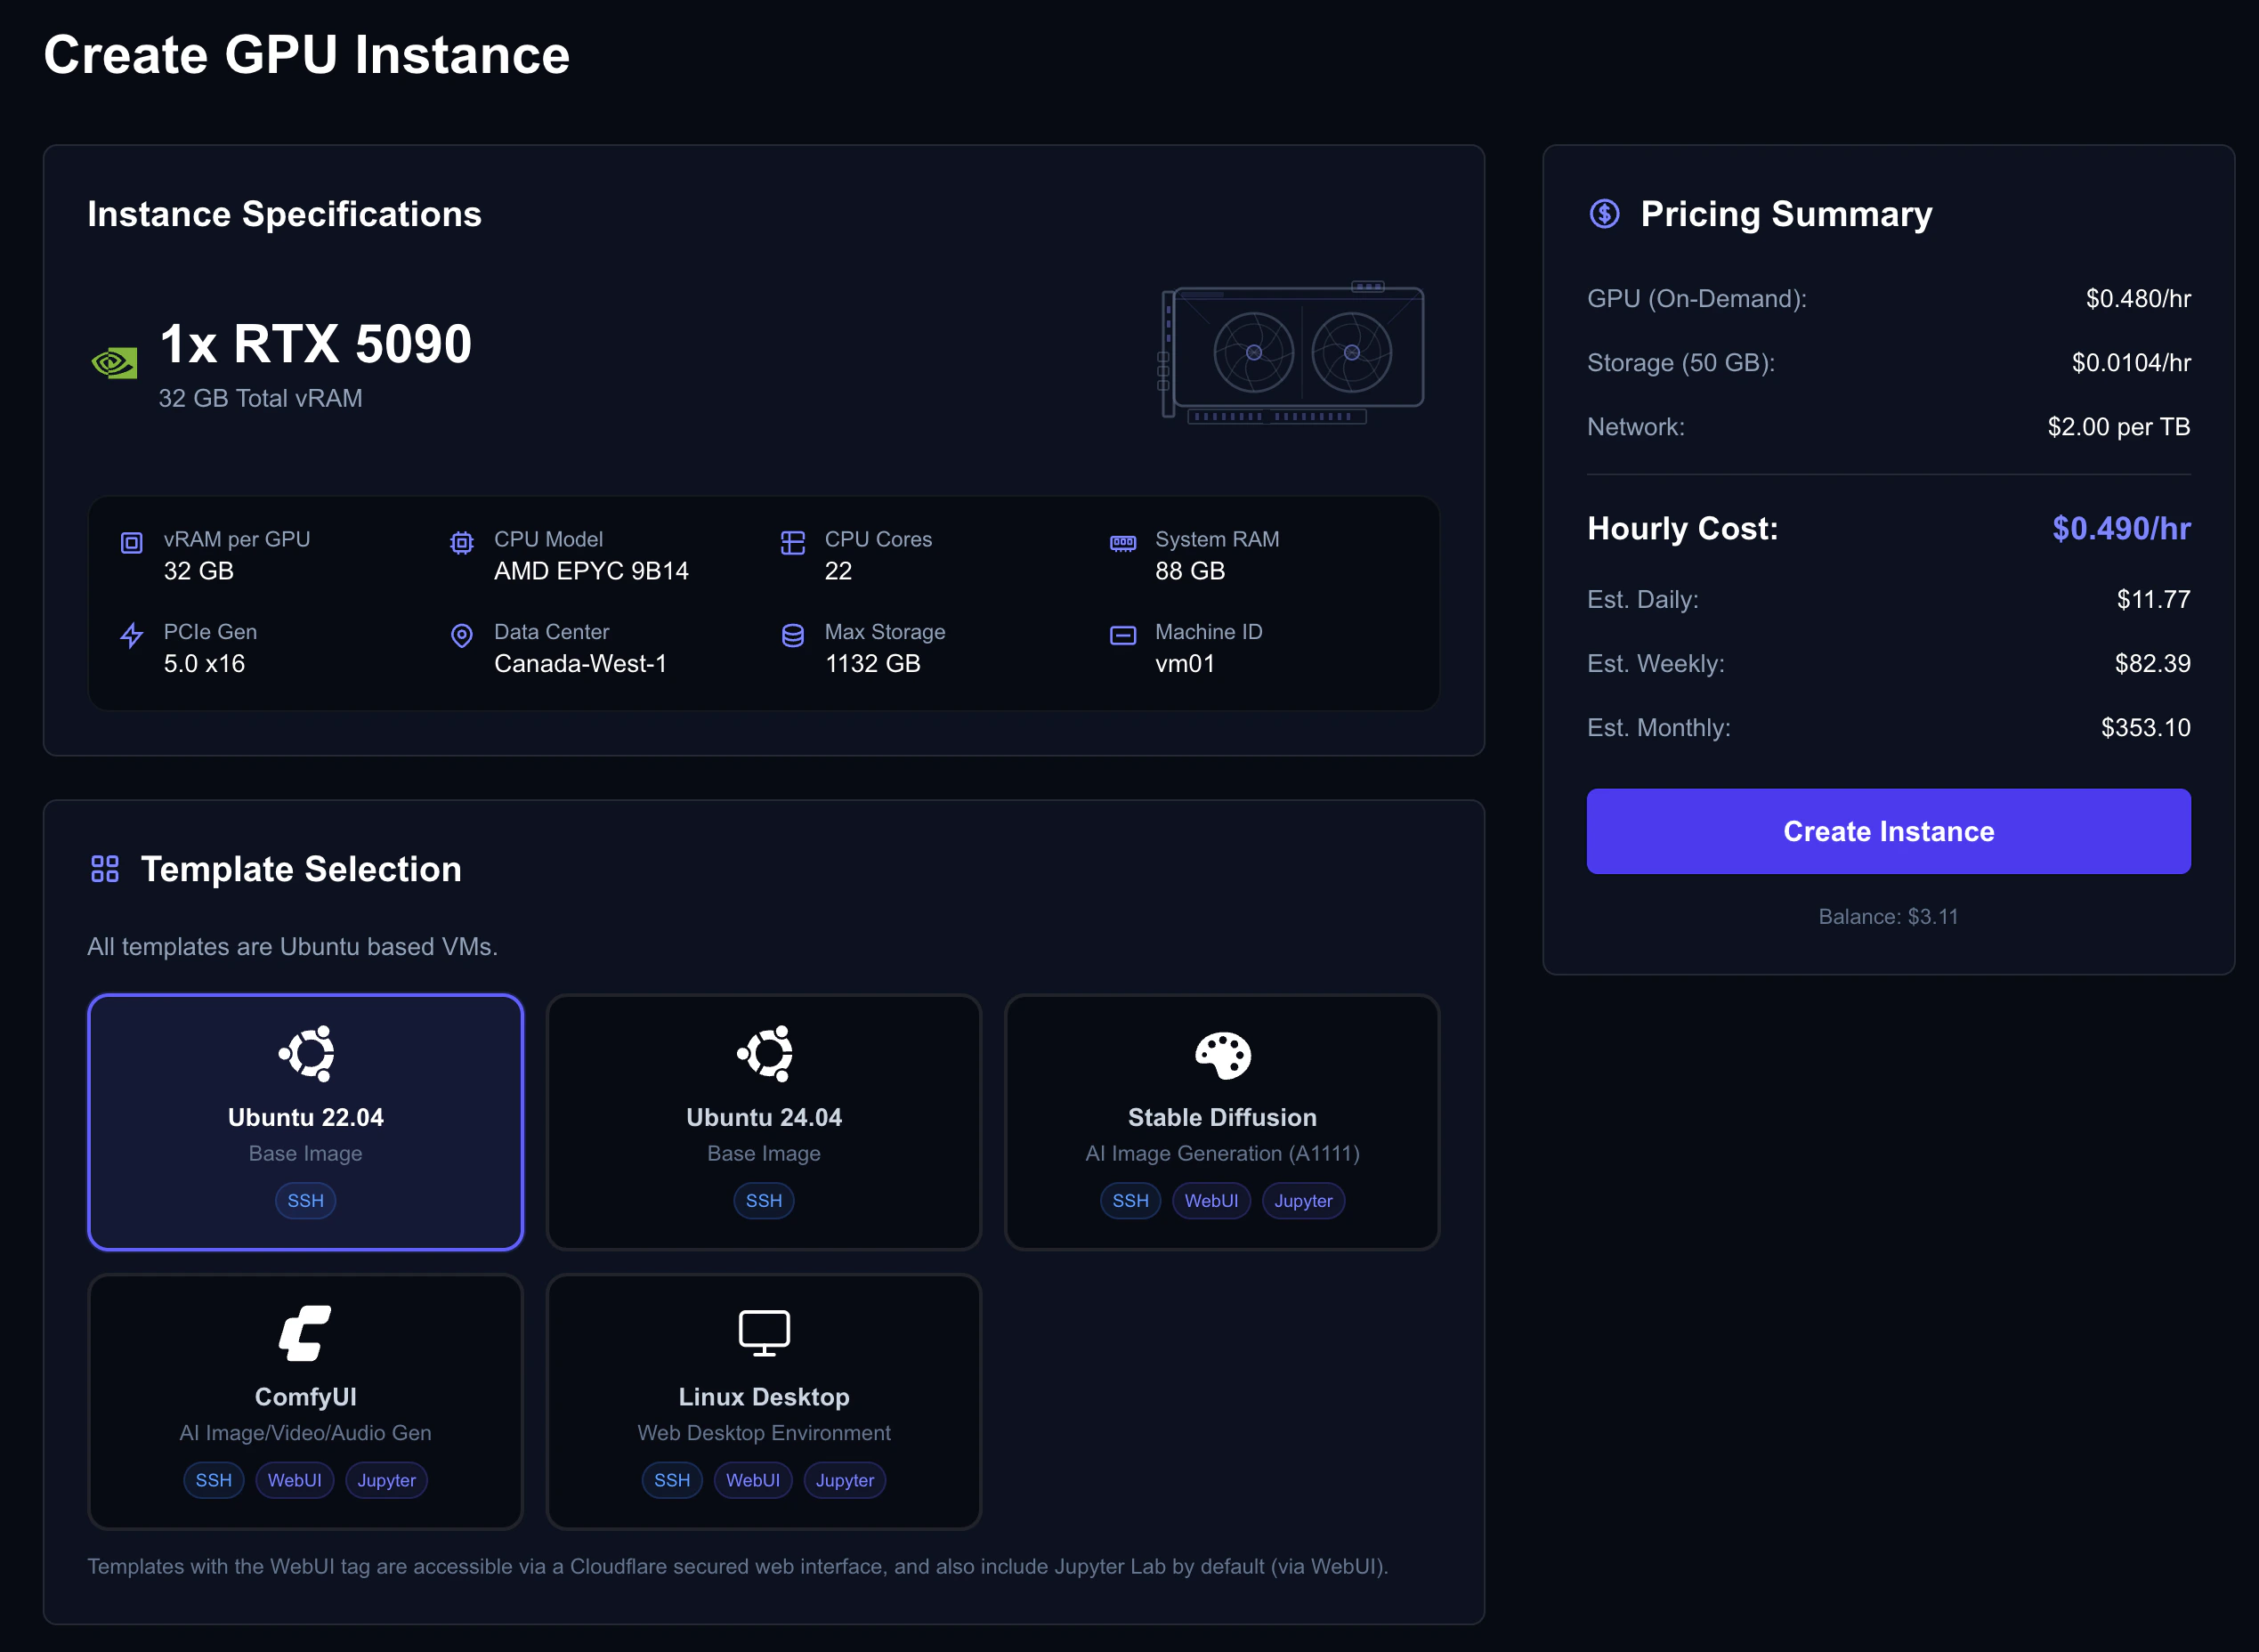
1. Go to the **Dashboard** and browse available GPU offers
2. Find a GPU that fits your needs (e.g., RTX 5090, RTX 4090)
3. Click **Create Instance** on the offer
4. Configure your instance:
* **Rental type** — On-demand (recommended for your first VM)
* **Template** — Ubuntu 22.04/24.04 (or choose a pre-configured template with WebUI access)
* **Storage** — Choose your disk size (Minimum 50GB)
* **Authentication** — Select your SSH key or choose a **strong** password to log into your instance with
5. Review the pricing estimate and click **Create**
6. Wait 1–10 minutes for provisioning to complete
Detailed guide with troubleshooting tips for all platforms.
## Step 4: Launch a VM
1. Go to the **Dashboard** and browse available GPU offers
2. Find a GPU that fits your needs (e.g., RTX 5090, RTX 4090)
3. Click **Create Instance** on the offer
4. Configure your instance:
* **Rental type** — On-demand (recommended for your first VM)
* **Template** — Ubuntu 22.04/24.04 (or choose a pre-configured template with WebUI access)
* **Storage** — Choose your disk size (Minimum 50GB)
* **Authentication** — Select your SSH key or choose a **strong** password to log into your instance with
5. Review the pricing estimate and click **Create**
6. Wait 1–10 minutes for provisioning to complete
 Not sure which rental type to pick? Start with **On-demand** — you can stop it anytime with no commitment. See the [Rental Types guide](/guides/rental-types) to learn about saving money with interruptible and reserved instances.
## Step 5: Connect to Your VM
Once your VM status shows **Running** in the dashboard:
Not sure which rental type to pick? Start with **On-demand** — you can stop it anytime with no commitment. See the [Rental Types guide](/guides/rental-types) to learn about saving money with interruptible and reserved instances.
## Step 5: Connect to Your VM
Once your VM status shows **Running** in the dashboard:
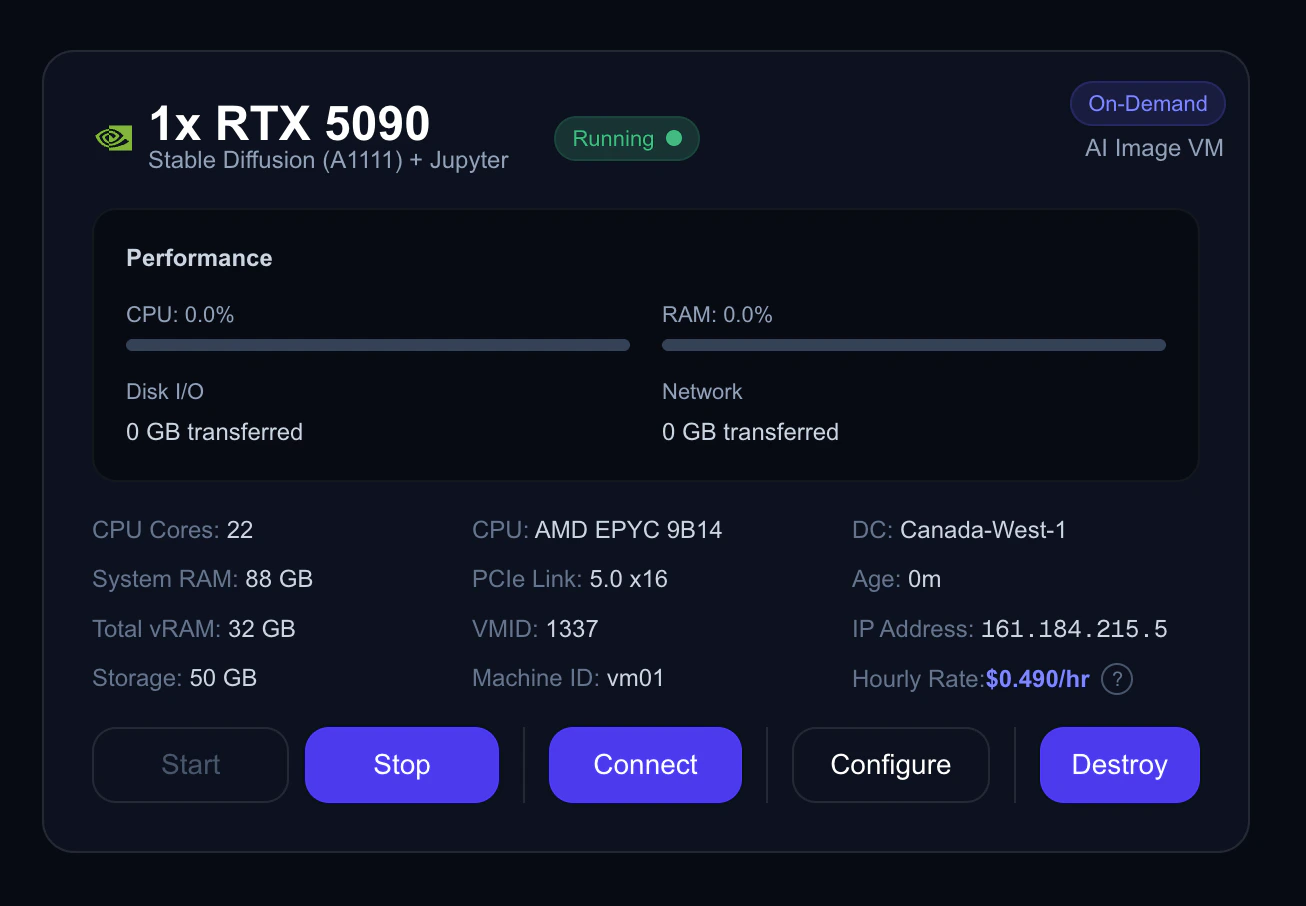 Open a terminal and run:
```bash theme={null}
ssh ubuntu@
```
Replace `` with the IP shown in your console dashboard.
If this is your first time connecting, you'll be asked to confirm the server fingerprint — type `yes` and press Enter.
Open **PowerShell** and run:
```powershell theme={null}
ssh ubuntu@
```
Replace `` with the IP shown in your console dashboard.
If this is your first time connecting, you'll be asked to confirm the server fingerprint — type `yes` and press Enter.
Windows 10/11 includes an SSH client by default. If the `ssh` command isn't found, see our [SSH Keys guide](/guides/ssh-keys) for alternatives like PuTTY.
## Step 6: Stop or Destroy When Done
When you're finished, you have two options:
### Stop Your VM (Pause GPU Billing)
Click **Stop** on your instance in the dashboard. This pauses GPU billing while keeping your data intact. Storage charges continue at a small rate.
### Destroy Your VM (Stop All Billing)
Click **Destroy** to permanently delete the VM and stop all billing.
Destroying a VM is irreversible. All data on the VM will be permanently deleted. Make sure you've saved anything important before destroying.
## What's Next?
Browse the marketplace and pick the right GPU for your workload.
Access your VM via SSH or the browser-based WebUI portal.
Open ports for Jupyter, APIs, and other web services.
Learn how to save money with interruptible and reserved instances.
Understand pricing, auto billing, and what happens at zero balance.
Automate your workflow with the Nova Cloud REST API.
Open a terminal and run:
```bash theme={null}
ssh ubuntu@
```
Replace `` with the IP shown in your console dashboard.
If this is your first time connecting, you'll be asked to confirm the server fingerprint — type `yes` and press Enter.
Open **PowerShell** and run:
```powershell theme={null}
ssh ubuntu@
```
Replace `` with the IP shown in your console dashboard.
If this is your first time connecting, you'll be asked to confirm the server fingerprint — type `yes` and press Enter.
Windows 10/11 includes an SSH client by default. If the `ssh` command isn't found, see our [SSH Keys guide](/guides/ssh-keys) for alternatives like PuTTY.
## Step 6: Stop or Destroy When Done
When you're finished, you have two options:
### Stop Your VM (Pause GPU Billing)
Click **Stop** on your instance in the dashboard. This pauses GPU billing while keeping your data intact. Storage charges continue at a small rate.
### Destroy Your VM (Stop All Billing)
Click **Destroy** to permanently delete the VM and stop all billing.
Destroying a VM is irreversible. All data on the VM will be permanently deleted. Make sure you've saved anything important before destroying.
## What's Next?
Browse the marketplace and pick the right GPU for your workload.
Access your VM via SSH or the browser-based WebUI portal.
Open ports for Jupyter, APIs, and other web services.
Learn how to save money with interruptible and reserved instances.
Understand pricing, auto billing, and what happens at zero balance.
Automate your workflow with the Nova Cloud REST API.